Image Credit fabbaloo.com
Consumer 3D printing has come on leaps and bounds over the past few years. However, one constant remains. And that is that FDM (fused deposition modelling) 3D printing, which make up the majority of the consumer 3D printing market, produces some rather unsmooth models.
This is in part due to the way that FDM printers work. Essentially the model is formed by heated filament layers, which are fused together, and built up layer by layer. The filament is controlled by a nozzle that moves around the printing bed, slowly releasing the filament, which is usually a flexible PLA or ABS plastic.
By forming a model layer by layer, you will achieve a result where the individual layers are easily visible. This is generally undesirable, which is where smoothing comes in to play.
Smoothing intricate 3D printed models isn’t always the easiest task, however by following these steps, you should be able to achieve a very good and smooth end result. This guide will show you how to make 3d printed models smooth.
Removing print supports
The first step with any 3D print that you create is to remove any supports that you may have used. This should be your first step even if you aren’t planning on smoothing your models.
The best way of removing any supports is to cut away the support as close to the model as you can. By cutting close to your model, you limit the amount of sanding required to make the support sit flat to your main model.
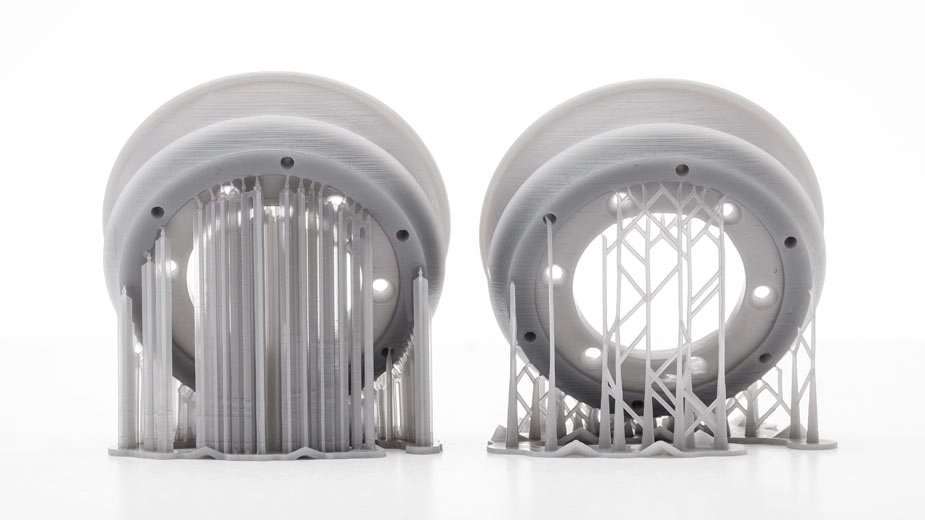
Image Credit 3dprint.com
Depending on your method of support building, some supports can also be dissolved away. However you go about removing your supports, ensure this is your first step. And if you haven’t used any supports, then perfect, you just saved yourself a nice bit of time! Proceed straight ahead to the next step.
Filling any holes
If you have any areas which have either not been printed or bonded properly, you may have to touch up a few holes. This can be done using;
- Wood filler
- Auto body filler
- Epoxy resin
- ABS / Acetone mixture
Both wood filler and auto body filler adhere to PLA plastic nicely and make for a perfect quick and easy 3D print filler. This is probably the easiest form of filling any holes or gaps.
However, if you have gaps that you can’t necessarily reach using traditional filler, you can go for epoxy resin or a mixture of ABS filament, and acetone. Both of these can be poured into any gaps and holes and will solidify either over time or through the use of heat.
Once you’ve successfully filled any gaps you may have, you can sand the excess filler material down to the body of your 3D printed model.
Fixing your model together
You may also need to fix elements of your 3D model together. This is especially common if you are 3D printing a model which is larger than your printer bed, or a complex multi-part object.
I won’t touch on how to glue or fix your model together, however, you should always ensure this stage is done before moving on with smoothing.
I have written a full how-to guide on how best to assemble 3D prints together. Read our complete guide to assembling 3D printed parts together.
If you start sanding and smoothing your object before you assemble it, you may over sand certain areas. This means your model may not assemble correctly.
Sanding your 3D model
Now we move on to the main part of smoothing your 3D printed model, sanding. This is where you will spend most of your time, and this is the part that will dictate how smooth of a finish you achieve.
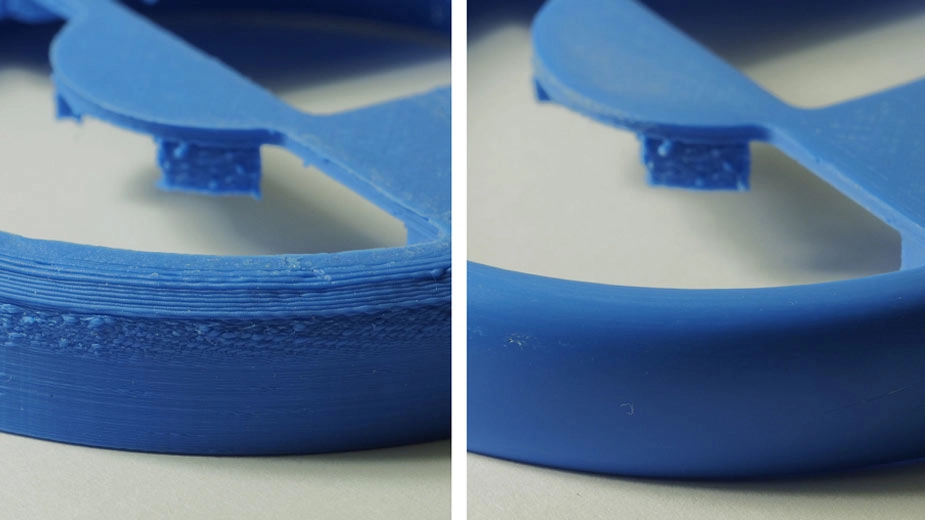
Image Credit 3dprint.com
To achieve the best results I would recommend using a range of sandpaper grit sizes, and certainly, opt for wet and dry sandpaper. Wet and dry sandpaper will simply help dissipate some of the heat that can build up from dry sanding.
You should try to wet your sandpaper enough so it never dries out. And continue to do this throughout the sanding process, across all grit sizes.
I’d recommend starting your sanding with coarse sandpaper such as 200 grit. This will be the easiest way to remove a lot of the harsh lines between layers.
You should then move through the range all the way up to 2000 or 3000 grit. 3000 grit sandpaper will achieve such a smooth result that it will start to shine before you even polish or paint your 3D printed model!
- Start with your coarsest sandpaper and give your whole model a base sand. This should work the model right down so you can’t feel any layer lines. My top tip is to sand in a regular circular motion. This will avoid a large build-up of linear sanding lines.
- Next, start to move through your sandpaper grit range in fairly even increments. You should move up from 200 to 400 to 600 etc. Ensure you use the same technique of sanding in circular motions throughout the process. Just ensure you aren’t over sanding and removing any of the details from your 3D printed model.
- Repeat this same process all the way through to your highest grit sandpaper. Once you get to this stage your model should feel incredibly smooth.
During each step throughout the grit range, you may not notice too much difference. However, when you finally reach the highest grit size, your model will look and feel very crisp.
If you know you are going to prime and paint your model, you may not want to sand all the way to 3000 grit. Instead, sand to a point where you are happy with the smoothness, and then prime your model. This is because once you have sprayed your 3D printed model with primer, you will then need to re-sand.
Priming your model
If you are planning on painting your model, you may want to build up a thin layer of primer. This will help your paint adhere to the PLA better.
When spraying your model with primer, you should ensure that you are building the primer up in thin even layers. In between each coat of primer, you should let the previous primer coat dry completely.
Priming your model will also let the primer fill any small defects that you may have with your model. Once you are happy with your priming coverage, you should circle back around to giving your model another sand.
You can combine sanding and priming as required. Meaning you can partially sand your model, then prime it, and then continue with the finer grit sandpaper to achieve a super smooth finish.
Polishing you 3D printed model
If you aren’t planning on painting your model, or if you’re working with decorative 3D printing materials such as wood or metal, you may want a polished finish.
Polishing your 3D printed model is the part where all of your hard work sanding pays off!

Image Credit Wired.com
If you are polishing a PLA model, I’d recommend using a good spray-on metal polish such as Brasso. If you are planning on polishing a decorative material such as wood, find a recommended polish for your material type.
To polish your 3D printed model up to a perfect shine, simply spray a small amount of polish onto a clean cotton cloth. Then work it into your model using the same technique you used when sanding above… small circular motions.
Once you are happy that you have worked in enough polish, you can move on to buffing your model, which will really allow it to pop. Simply fold your cloth over to an unused area with no polish on it. Then repeat the step above to buff up your model.
Other Methods
If you’re feeling fancy or simple sanding isn’t giving you the finish you desire, there are a few alternative methods to make 3D printed models smooth.
Acetone mist
If you are working with ABS filament then acetone misting could be the answer to your smoothing prayers. This method only works with ABS and won’t stick to PLA filament.
The main attraction of acetone mist is the pure simplicity of the process. Acetone reacts with the ABS and slowly erodes it away. When done in a controlled way this will help smooth away any sharp edges or layer lines.
There are homemade methods of creating acetone baths and misters, and I’ll create a detailed guide on how to do this in the future.
If you want to purchase an acetone mist machine, a company called Polymaker currently sell a product called the Polysher. This product confines your 3D printed model inside a chamber, where the mist is released. This mist then reacts with the ABS and melts away any sharp areas of your model.
Once finished, your model will be slightly tacky to the touch, so it’s recommended that you let it sit for around half an hour before handling it. The longer your model is exposed, the smoother the finish will be. Although a little sanding is still recommended to bring it to a perfect shine.
Feeling brave?
If you have a heat gun and are feeling brave, you could opt to smooth your model using heat. This is a risky method as heat will melt your model, and too much heat will destroy your 3D print.
However, if you are experienced in using a heat gun, you can achieve very good smooth 3D printed models.
The best method of using a heat gun is to follow the steps above in regards to preparing your model and sanding it. Sanding will expose more of the plastic, allowing the heat to better affect your model.
Then partway through the sanding process, you should start to apply heat with your heat gun.
You should look to keep your model moving at all times while applying minimal heat to start with. Over time you can increase the heat, allowing those layer lines to start to melt away.
This method will certainly take some practice to perfect. So I’d recommend practising on some small test models before progressing up to more complex 3D printed models.
Look into SLA printing
Finally, if you would rather do away with a lot of the smoothing workload after every 3D print. You could look into changing up your printing method.

Image Credit Elegoo.com
SLA 3D printing certainly produces more impressive results straight out of the printer.
SLA printing differs from FDM printing in that instead of building up individual layers of material, the printer uses a laser to cure liquid resin into hardened plastic.
This method produces a result with no distinguishable lines or layers. Instead, you will achieve a very smooth model. SLA printing is also renowned for its precision and quality. So much so, that even large manufacturers produce concepts using SLA printing.
Resin printing used to be reserved for large manufacturing companies, however recently it has become much more affordable. This allows it to be used more in consumer 3D printing.
Brands such as Elgoo and Phrozen have released a selection of resin printers for a reasonable budget. And they are remarkably easy to use.
Check out our best budget resin printer guide to find out which resin printer we’d most recommend.
Conclusion
Sanding your PLA or ABS 3D printed models shouldn’t be too much of an effort. If you follow the simple steps above, you should be able to achieve very impressive results with minimal work. And the steps above are the best way for how to get a smooth finish on a 3D print.
As always, the more effort you put into smoothing your 3D printed model, the better the results will be. If you can practice and perfect your sanding technique, you will be producing extremely smooth 3D printed models in no time.
Just ensure you are careful not to go too far with whichever smoothing technique you use. Too much pressure or heat can wreck your 3D printed model in no time! Happy printing.